How to Create Before-and-After Visuals with AI
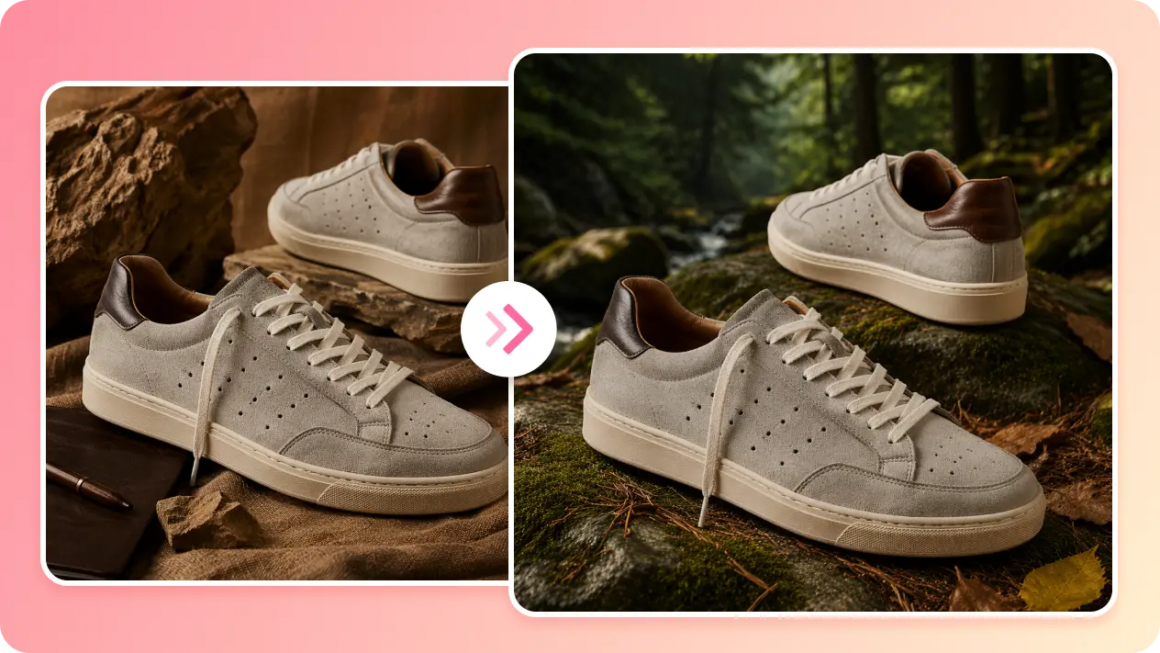
Nothing sells transformation quite like seeing it happen with your own eyes. A renovated room, a restyled space, a glow-up of any kind, the impact lands instantly when placed side by side with where it started. The catch has always been that capturing both halves of that story usually meant staging two separate shoots weeks or months apart. An AI image generator removes that waiting entirely, letting you generate both the “before” and the “after” from the same creative session.
Dreamina, powered by its most advanced image generation model, Seedream 5.0 Pro, handles this kind of transformation storytelling with real consistency, keeping the underlying subject recognizable across both states while everything else shifts convincingly. Here’s how to build a before-and-after that actually reads as one continuous story.
Why consistency between the two halves matters most
The entire power of a before-and-after comes from the viewer recognizing it as the same space, product, or subject, just transformed. If the underlying structure shifts too much between the two images- a different room shape, a different camera angle, an inconsistent light source- the comparison loses its impact and starts to feel like two unrelated photos rather than a genuine transformation. Locking down what stays the same is just as important as deciding what changes.
Deciding what actually transforms
Before generating either half, it helps to be specific about which elements are part of the transformation and which need to remain fixed as anchors:
- The room’s basic architecture, walls, windows, layout should usually stay consistent
- Furniture, color palette, and styling are typically what change
- Camera angle and framing should match closely between both versions
- Lighting can shift as part of the transformation, but the light source’s direction should feel logical
Your 3-step transformation story with Dreamina
With your fixed anchors and transforming elements planned out, here’s exactly how to generate both halves.
Step 1: Write a text prompt and/or add a reference image
Navigate to Dreamina and write a detailed text prompt describing the “before” state in clear, specific detail, including a person dressed appropriately for the context if your scene includes one. Upload a reference image if you have an actual starting point you want to base the transformation on.
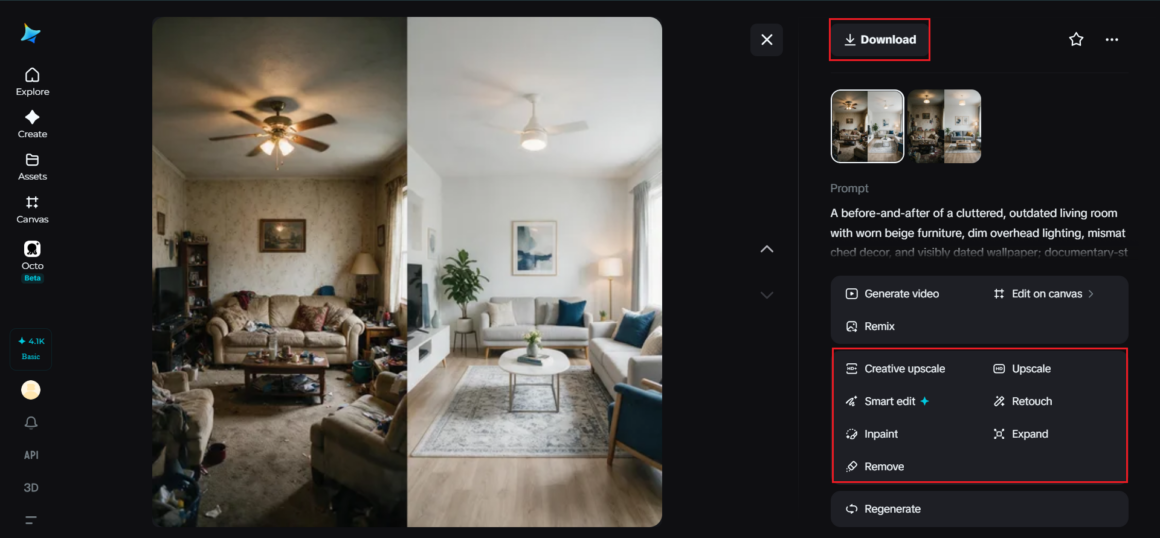
A solid sample prompt might read: A before-and-after of a cluttered, outdated living room with worn beige furniture, dim overhead lighting, mismatched decor, and visibly dated wallpaper; documentary-style interior photography; a straight-on camera angle; and the changed, revamped living room.
Describing the before state with real specificity gives you a clear foundation to build the after image against.
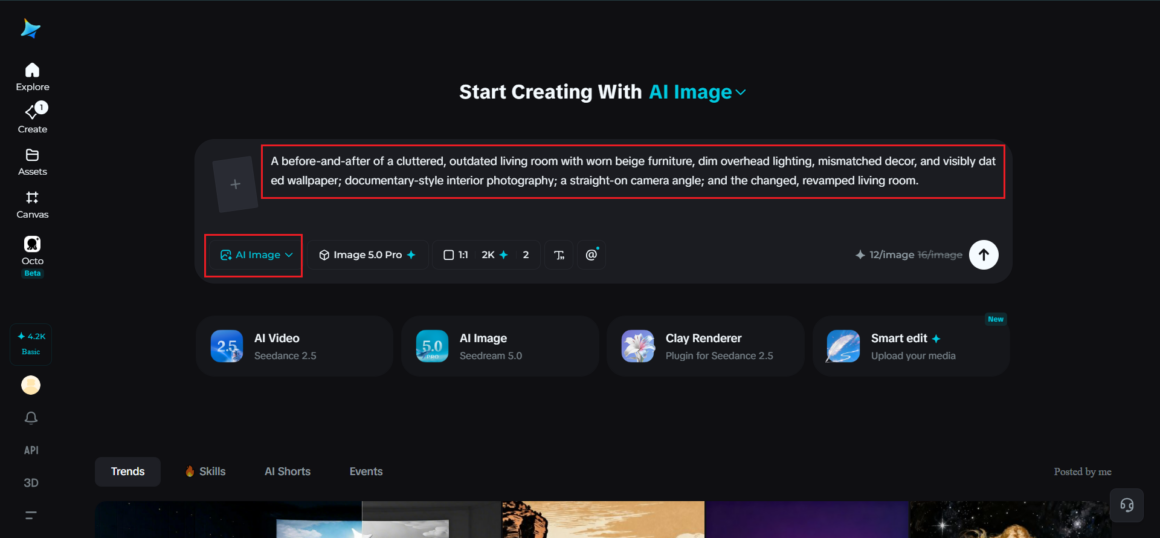
Step 2: Adjust parameters and generate
Before generating, set your parameters and keep them identical for both the before and after versions. Select Image 5.0 Pro, powered by Seedream 5.0 Pro, as your model, then choose your aspect ratio, image size, and resolution, using the same settings for both images so the comparison feels seamless, and 2K resolution to keep detail sharp in both states. Click Dreamina’s generate icon to produce your first image, then repeat with your after prompt.
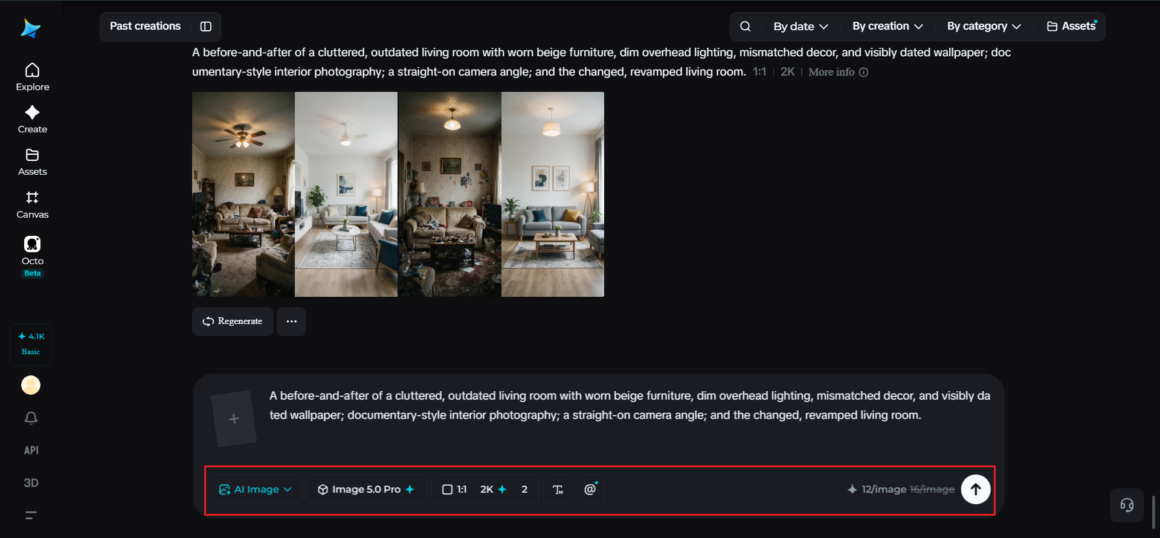
Step 3: Customize and download
Once both images are generated, use Dreamina’s AI customization tools to align them more closely — inpaint to adjust any element that shifted more than intended between versions, expand to match framing if one image needs slightly more context, remove to eliminate anything inconsistent between the two, and retouch to balance lighting so the comparison reads clearly. When both halves feel like they belong to the same story, click the Download icon to save them.
Writing your “after” prompt against your “before”
Rather than treating the after image as a completely separate generation, write its prompt as a direct response to the before, changing only the specific elements you identified as part of the transformation. If your before prompt specified “worn beige furniture, dim overhead lighting, mismatched decor,” your after prompt should deliberately address each of those same categories, “sleek modern furniture, bright natural light, cohesive minimalist decor,” rather than describing an entirely different scene.
Meet Seedream 5.0 Pro: precision for paired consistency
A handful of Seedream 5.0 Pro’s specific capabilities matter significantly for this exact kind of paired-image work.
Multi-layer visual control for isolated changes
Multi-layer visual control separates a scene’s structural elements from its styling and decor, making it genuinely practical to change furniture and color while keeping architectural elements like windows and walls consistent between versions.
Pinpoint precision editing for camera and framing alignment
With point selection, lasso, sketch guidance, and regional controls, pinpoint precision editing lets you make small corrections to align framing or perspective between the before and after if they drift slightly apart.
Deep reasoning generation for logical transformation
Deep reasoning generation analyzes your prompt’s relationships and intent before producing an image, helping the after state feel like a believable continuation of the same physical space rather than an unrelated scene.
2K output for detail that holds up in comparison
Since before-and-afters often get examined closely by viewers checking for genuine change, 2K output quality ensures both versions hold up to that scrutiny with crisp, accurate detail.
Presenting the comparison effectively
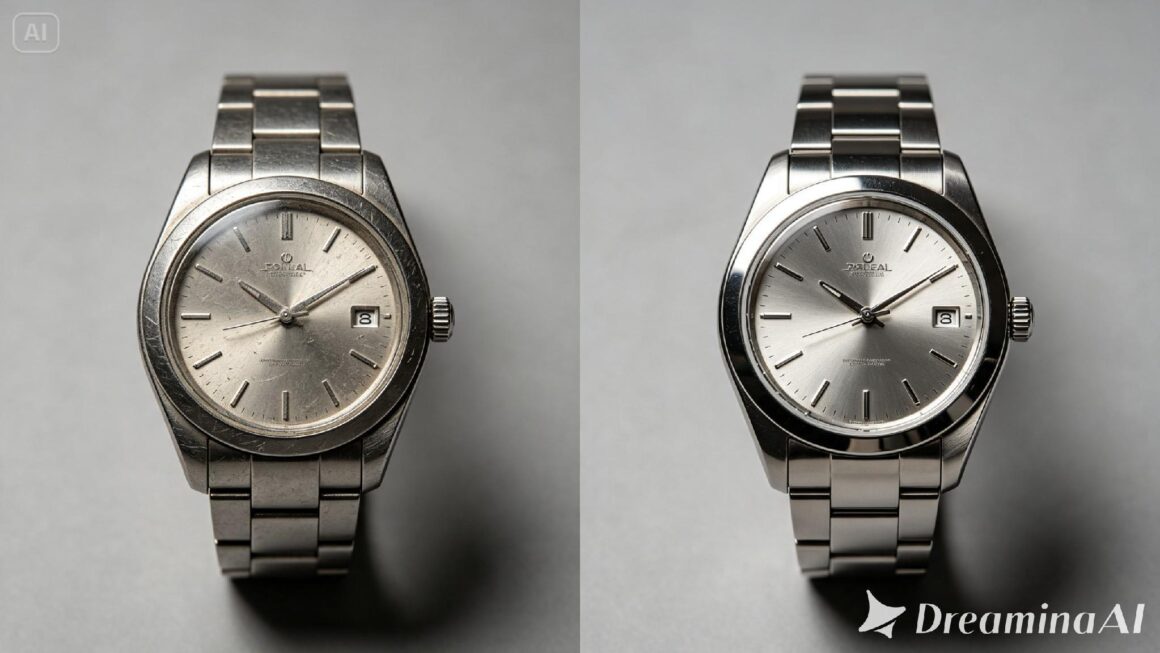
Once both images are ready, how they’re displayed matters almost as much as the images themselves. A clean side-by-side layout, or a slider format for digital use, with consistent labeling makes the transformation immediately clear. Avoiding drastically different cropping or zoom levels between the two images keeps the comparison feeling fair and genuine rather than exaggerated.
Where before-and-after visuals get real use
This kind of paired transformation imagery shows up constantly across a range of practical fields:
- Interior design and home renovation marketing
- Beauty, skincare, and wellness product demonstrations
- Landscaping and outdoor space transformations
- Fitness and personal transformation storytelling
Conclusion
A convincing transformation story doesn’t require weeks between two separate shoots, just a clear plan for what stays fixed and what changes, paired with the right AI image generator to execute both halves consistently.
With Dreamina and its advanced Seedream 5.0 Pro model, the before and after can be generated in the same session while still reading as one genuine, connected story.
Lock in your anchors, plan your transformation deliberately, and let Dreamina bring both halves of the story into view.